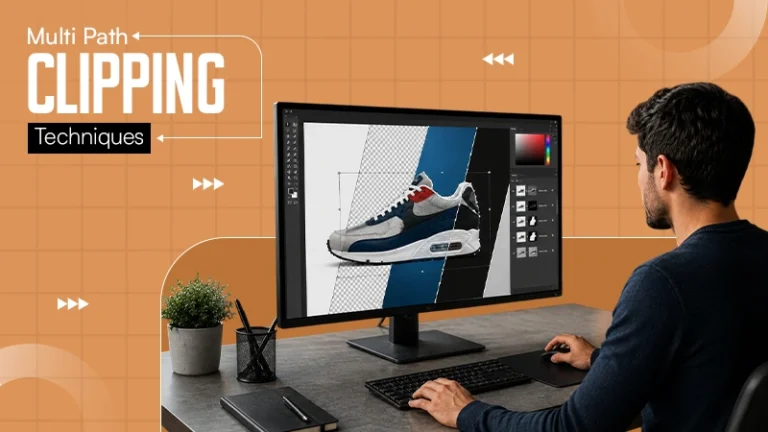
When working on images of products with multiple distinct zones, a single-path clipping is not enough. If you have ever tried removing the background from any product photo which includes overlapping, you must know that single-path clipping can only remove one background. That’s when multi-path clipping comes into the picture, as it creates separate outlines for different materials, colors, textures, or components within one image. Multi-path Clipping is used by professionals for complex photographs, such as a shoe with different colored panels and a jacket with a zip, lining, or logo areas.
The 4 Core Use Cases for Multi-Path Clipping
Multi-path Clipping can be a big help when the following problems arise:
- Color Variant Creation- With individual isolated paths changing color or one zone is easy without affecting the others.
- Component Isolation- A product with multiple parts requires independent editing so that the naturalness of the product image does not vanish.
- Complex Background Removal- A unique challenge arises when a product overlaps itself. The picture starts to look odd when attempting to remove the background.
- Multi-Layer Composite Assembly- Individual components in pictures for a catalogue layout or a multi-channel marketing piece usually end up on separate layers in InDesign, Illustrator, or other layout tools.
Also Read: What Is a Clipping Path? Types, Uses, Tools
How to Create Multiple Clipping Paths in Photoshop:: Step-by-Step Technique
Most professionals use the Pen Tool for creating multiple clipping paths in Photoshop. Before drawing a single anchor point, first adjust your zoom level between 100% and 200%, as we don’t want to miss an anchor point or produce an extra one.
1. Creating the First Path
Open the Paths panel. Click the new path icon at the bottom of the panel to create a fresh, empty path. And place anchor points on curves and edges. After placing all anchors of your first path, click on your first anchor accurately to close the path.
2. Creating Subsequent Paths for Each Zone
Click on the new path icon again to create your next/every path for each zone. Make sure you are not drawing on the first path. Do not forget to name your paths like Path 1 = bg, Path 2 = product zone A. Every path you draw is available on the Paths Panel only if you save it.
3. Setting Up Your Paths Panel for Multi-Path Work
You need to open your Path Panel in Photoshop by clicking on Window, then Paths. Place it alongside your Layers and Channels panels. Now, click on View, then Show, and select Grid from there to make it visible.
4. Saving and Exporting Clipping Paths to InDesign or Other Software
Double-click on the path in the Paths panel to save it. Then go to the three-line icon at the top right. Select “Clipping Path.” Choose which saved path you want to designate and set flatness 1-3. Save the file as a TIFF or EPS format. InDesign handles EPS and TIFF clipping paths natively. Illustrator works best with placed PSD files where paths are preserved as vector data.
Multi-Path Clipping for Clothing and Apparel Products
A single jacket has multiple different zones- outer fabric, zip, collar, cuffs, any logo or print. Multi-path clipping is required for such types of clothes. A shirt with a bold pattern requires multi-path clipping for its pattern zone to be isolated separately from the base fabric. The same applies to the shoes. Multiple clipping paths in Photoshop are essential for the ghost mannequin editing as well. They will be the collar path, inner lining path, and sleeve-end path. For a natural and clear e-commerce product photo, multi-clipping is necessary for clothing and apparel products.
Multi-Path Clipping for Jewelry and Accessories
For Jewelry and Accessories, advanced clipping techniques are a necessity as every zone reacts differently to the light, which is why our jewelry photo editing uses dedicated paths per surface.. You may also find some reflective surfaces and a few matte surfaces on the same piece of jewelry. And due to this, you will be able to see color variations and require the use of multi-path clipping for every zone for editing one without making changes to the other. For example, in a ring, three different zones are found: the band, the setting, and the stone. The more complex jewelry piece is a chain with its linking way. The visible overlapping and spaces scream for multi-path clipping.
Also Read: Best Jewelry Photo Editing Software
Multi-Path Clipping for Electronics and Hard Goods
For electronics and hard items, many distinct paths are drawn while editing their photographs. For example, a smartphone has a screen, frame, cable port, physical buttons, and a camera module. While making the smartphone image ready for an e-commerce catalogue, multi-path clipping allows all color variants to be produced from a single base image. The frame path is isolated and re-colored a bit for each variant, while the screen path stays untouched. The button paths are also reworked. And this is how it’s done.
Common Mistakes in Multi-Path Clipping and How to Fix Them
- Not closing the paths properly or failing to connect anchor points. Never forget to zoom in before clicking the close option.
- Not using enough anchor points on curved edges. The fix may require you to work on higher zoom levels.
- Forgetting to label paths before export. Make it a rule to name paths before going on to the drawing part.
- Mixing Raster and Vector Path Work by using the Lasso Tool or the Quick Selection Tool, where the Pen Tool is best for consistency.
- Softens the hard-edged products with Path Feathering. Keep feathering at zero for all hard-edge product work.
DIY Multi-Path Clipping vs. Outsourcing: Time, Cost & Accuracy Compared
Multi-path clipping is a time and labour-intensive job. Even a moderately complex product image, like a shoe with upper, midsole, and outsole sections, takes 30-45 minutes for an experienced editor, let alone the complex ones that require more effort and time from the editor. If you’re going with a junior editor in-house, it will take 2-4 hours for multi-path clipping of just one image, as he must be developing his skills now and is not yet proficient in some tasks. In such cases, outsourcing to a professional multi-path clipping path service not only can speed up your whole process, but also the outcomes will be more accurate and without errors. No need to stress about finding the right editor. Visuals Clipping has 20+ years of experience in the same subject. We work with 250+ editors who handle multi-path clipping for product images on a daily basis. Try out our free trial to see real results.
Also Read: Clipping Path vs Image Masking
Conclusion
Multi-path clipping is only required when complex professional-level editing work is needed for matching precision e-commerce standards. Multi-path clipping is the foundation of professional ecommerce image editing for complex product catalogs.Visuals Clipping handles multi-path clipping across all complexity levels, from straightforward 2-path product isolations to intricate 8-plus path edits for the most technically demanding product categories.
Frequently Asked Questions
Q1: What is multi-path clipping?
Ans: Multi-path clipping is an advanced image editing technique where multiple independent paths are drawn within a single product image, and every one of them isolates a different component or zone.
Q2: How many paths can a single image have?
Ans: There is no specific quantity finalized for the number of paths a single image usually has. It depends on how complex the product image is.
Q3. What products need multi-path clipping?
Ans: Many products require multi-path clipping, including clothes, electronic appliances, footwear, and hard goods with separate component sections.
Q4. Can I create multi-paths in Illustrator?
Ans: Illustrator isn’t used to create clipping paths for photos, that’s done in Photoshop. However, Photoshop files with saved paths can be placed into Illustrator, where the paths are preserved as vector data for layout work.
Q5. How much does multi-path clipping cost per image?
Ans: The cost for multi-path clipping per image depends on the complexity of the product image that needs to be edited. You can contact the Visuals Clipping team for a free consultation, as we offer very reasonable prices.